To start the installation of Docker, we are going to use an Ubuntu instance. You can use Oracle Virtual Box to setup a virtual Linux instance, in case you don’t have it already.
The following screenshot shows a simple Ubuntu server which has been installed on Oracle Virtual Box. There is an OS user named demo which has been defined on the system having entire root access to the sever.

Step 1 − Before installing Docker, you first have to ensure that you have the right Linux kernel version running. Docker is only designed to run on Linux kernel version 3.8 and higher. We can do this by running the following command.
uname
This method returns the system information about the Linux system.
Syntax
uname -a
Options
a − This is used to ensure that the system information is returned.
Return Value
This method returns the following information on the Linux system −
- kernel name
- node name
- kernel release
- kernel version
- machine
- processor
- hardware platform
- operating system
Example
uname –a
Output
When we run above command, we will get the following result −

From the output, we can see that the Linux kernel version is 4.2.0-27 which is higher than version 3.8, so we are good to go.
Step 2 − You need to update the OS with the latest packages, which can be done via the following command −
apt-get
This method installs packages from the Internet on to the Linux system.
Syntax
sudo apt-get update
Options
- sudo − The sudo command is used to ensure that the command runs with root access.
- update − The update option is used ensure that all packages are updated on the Linux system.
Return Value
None
Example
sudo apt-get update
Output
When we run the above command, we will get the following result −

This command will connect to the internet and download the latest system packages for Ubuntu.
Step 3 − The next step is to install the necessary certificates that will be required to work with the Docker site later on to download the necessary Docker packages. It can be done with the following command.
sudo apt-get install apt-transport-https ca-certificates

Step 4 − The next step is to add the new GPG key. This key is required to ensure that all data is encrypted when downloading the necessary packages for Docker.
The following command will download the key with the ID 58118E89F3A912897C070ADBF76221572C52609D from the keyserver hkp://ha.pool.sks-keyservers.net:80 and adds it to the adv keychain. Please note that this particular key is required to download the necessary Docker packages.

Step 5 − Next, depending on the version of Ubuntu you have, you will need to add the relevant site to the docker.list for the apt package manager, so that it will be able to detect the Docker packages from the Docker site and download them accordingly.
Precise 12.04 (LTS) ─ deb https://apt.dockerproject.org/repoubuntu-precise main
Trusty 14.04 (LTS) ─ deb https://apt.dockerproject.org/repo/ ubuntu-trusty main
Wily 15.10 ─ deb https://apt.dockerproject.org/repo ubuntu-wily main
Xenial 16.04 (LTS) - https://apt.dockerproject.org/repo ubuntu-xenial main
Since our OS is Ubuntu 14.04, we will use the Repository name as “deb https://apt.dockerproject.org/repoubuntu-trusty main”.
And then, we will need to add this repository to the docker.list as mentioned above.
echo "deb https://apt.dockerproject.org/repo ubuntu-trusty main” | sudo tee /etc/apt/sources.list.d/docker.list

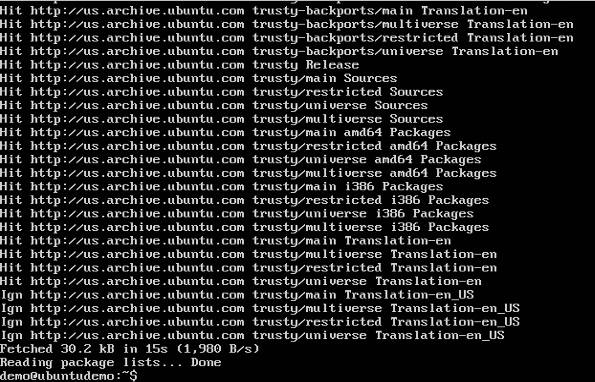
Step 6 − Next, we issue the apt-get update command to update the packages on the Ubuntu system.

Step 7 − If you want to verify that the package manager is pointing to the right repository, you can do it by issuing the apt-cache command.
In the output, you will get the link to https://apt.dockerproject.org/repo/

Step 8 − Issue the apt-get update command to ensure all the packages on the local system are up to date.
Step 9 − For Ubuntu Trusty, Wily, and Xenial, we have to install the linux-image-extra-* kernel packages, which allows one to use the aufs storage driver. This driver is used by the newer versions of Docker.
It can be done by using the following command.
sudo apt-get install linux-image-extra-$(uname -r) linux-image-extra-virtual

Step 10 − The final step is to install Docker and we can do this with the following command −
sudo apt-get install –y docker-engine
Here, apt-get uses the install option to download the Docker-engine image from the Docker website and get Docker installed.
The Docker-engine is the official package from the Docker Corporation for Ubuntu-based systems.

In the next section, we will see how to check for the version of Docker that was installed.
Docker Version :-
To see the version of Docker running, you can issue the following command −
Syntax
docker version
Options
version − It is used to ensure the Docker command returns the Docker version installed.
Return Value
The output will provide the various details of the Docker version installed on the system.
Example
sudo docker version
Output
When we run the above program, we will get the following result −

Docker Info
To see more information on the Docker running on the system, you can issue the following command −
Syntax
docker info
Options
info − It is used to ensure that the Docker command returns the detailed information on the Docker service installed.
Return Value
The output will provide the various details of the Docker installed on the system such as −
- Number of containers
- Number of images
- The storage driver used by Docker
- The root directory used by Docker
- The execution driver used by Docker
Example
sudo docker info
Output
When we run the above command, we will get the following result −
 |